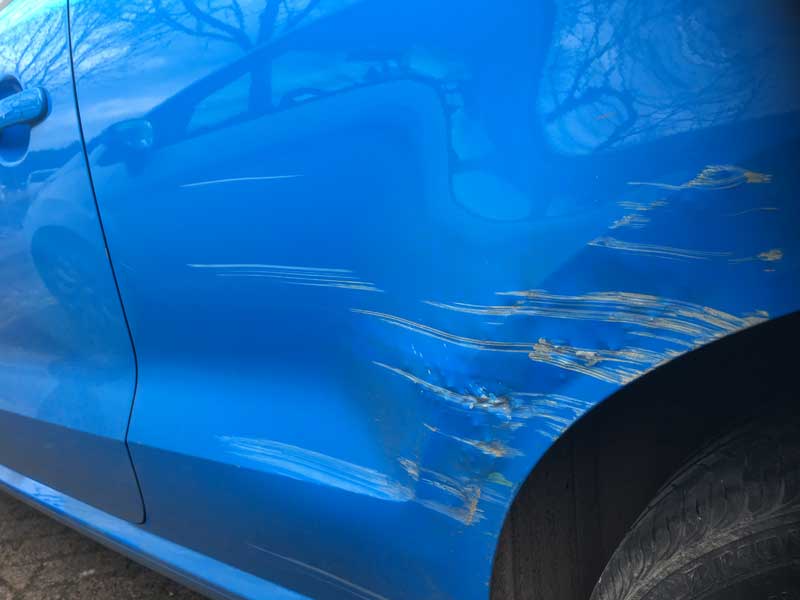
guide to alloy wheel repair
A Complete Guide To Alloy Wheel Repairs
January 24, 2020
Car Battery Care When Not In Use
April 2, 2020
Show all

Car Scratch Repair Guide

Car Scratch Repair Guide

Car scratches often occur more frequently than you may assume. Whether the cause of the scratch was a careless driver, loose pebbles, or even a clumsy person leaving a mark whilst passing your car. If not dealt with quickly, any deep scratches or chips can start exposing a car’s bare metal and can rust within a few days, causing a much larger job.


This car scratch repair guide will provide 4 quick and easy steps, to aid in ridding of those pesky car dents, marks and scratches.

Step 1: Clean & Prepare

Begin the process by simply washing your car, using car shampoo and a sponge, or microfibre cloth. Make sure the car is then completely dry before progressing. It’s time to begin assessing the depth of the scratch, checking for the severity and size. Start preparing the area by using masking tape to cover the surrounding area to avoid any spray coating part of the undamaged paintwork. It’ll be better to be generous with the masking tape, to be safe, rather than sorry.


Start using a paint rubbing compound on and around the scratch, using a circular motion to remove a very thin layer of the surrounding paint – a couple of centimetres either side of the car scratch will do the trick. This step will aid you later in the process when blending the new coats. Any excess compound or mess should then be cleaned for clarity whilst painting.


Step 2: Apply The Colour Coat

Begin this step by identifying the exact colour of your car’s paintwork, it is essential that the colour of the touch up paint is the perfect colour. There are tools available that will assist you in finding the correct paint, such as Holts Paint Match Pro, based on the manufacturer, colour and year. Applying the paint can be achieved with the use of a spray can, or using a fine paint brush. A cocktail stick can be used to build up the paint layers on smaller dents or scratches. We suggest leaving 10-30 minutes for the paint to dry, in between layers, depending on the temperature outside.


Step 3: Flatten The Area

At this point, it is time to begin flattening the area in which you painted, for a flat finish, unnoticeable compared to the original paint job. This can be done with a very fine grit wet and dry sandpaper (2,500 grit). An abrasive rubbing/cutting compound can also be used, depending on the size of the car scratch. Just like the preparation stage, rub the compound in a circular motion a couple of centimetres in each direction of the car scratch. If sandpapering, begin with a coarse sandpaper, then change the paper to a finer grit, working to the 2,500 grit paper in stages.


Step 4: Finishing Touches

Finally, make use of a polish (not a polish compound), to give your car a professional quality finish. Follow the manufacturer’s instructions for the polish and apply. Optionally, use a wax and buff for added gleam and shine.


At Scuffdoc, we pride ourselves on providing a professional service with years of experience in dealing with scuffs, scrapes, scratches, vandal damage and general corrosion. Visit our website for more information, or contact us now!

Leave a Reply

Your email address will not be published. Required fields are marked *

07885 407 588